Showing posts with label clothing. Show all posts

Thursday, July 18, 2013

Denim Maxi Refashion


                                    Denim Maxi: New York & Co Refashion (thrifted), Cream Tank (Kohls), Belt: Gap (thrifted)

I had a chance to wear my latest refashion today, and while I feel I have to channel my inner cowgirl for this look, I must admit it was super comfy. While I am not sure how much this look is me, I decided to go with it. I recently found this New York and Co Maxi Dress for $2.99 at a thrift store. I tried it on and to say the bust portion was small is an understatement. I am not large in the bust at all and this barely covered me...at all...so I knew it needed a new life.

I thought about how I could add a new top to keep it a dress, but eventually I decided to make a quick and easy change.

First, I cut off the top of the dress until the fabric in the front was even with the top of the back.


Then I serged the front portion of the skirt so there would not be any fraying.


Last, I simply folded the new skirt waistband in half and stitched it down near the top edge using elastic thread in the bobbin. I was going to also stitch near the bottom edge of the new waistband, but ended up keeping it fairly rough inside and just tacked it down in a couple places to keep it in place. And that was it.


It has a nice full ruffle on the bottom and looks somewhat dressed up all while having the ease of denim. The top I paired it with was nice and light and I was able to wear this to the park today in 90 degree temps and stay comfortable. Plus, I could wear it with flat sandals, which made running after the little hooligans much easier. 

I would say I am happy to have added this versatile skirt for under $3 and only a little of my time. I am definitely on a refashion kick this week...more items to come soon as well as a free pattern.

Shannon

Wednesday, July 10, 2013

DIY Towel Pants - Mini Boden Knockoff


Earlier this spring I was flipping through the pages of the latest Mini Boden. I came across these adorable pants made of towelling material.


Here is my DIY Towel Pant version.


First, find yourself a cute towel. I picked up one last year from Walmart for about $5. I have seen so many cute ones out this year...but I am waiting for the clearance prices :) 


Next, find a loose fitting children's pants pattern or create your own from tracing a pair of your child's pants. For this DIY version I chose McCalls 5222. Next, carefully line up your pattern using one half of the towel. Do not fold the fabric in half and cut 2 fronts and 2 backs at once if you have a pattern that needs to line up. Instead, cut one front and one back piece on one half of the towel as shown below.


Then use those pieces to cut the 2nd piece. Simply flip them over onto the other uncut half of towel and line up your pattern. You can see how I matched my circles. I put some arrows on the photo below to help show this step. 


After cutting out your pattern, sew the pants following the instructions until the waistband. For the waistband, I decided to use a contrasting rib knit similar to the Mini Boden pants. I did not thread a drawstring through but may try that on a future pair for my son. 

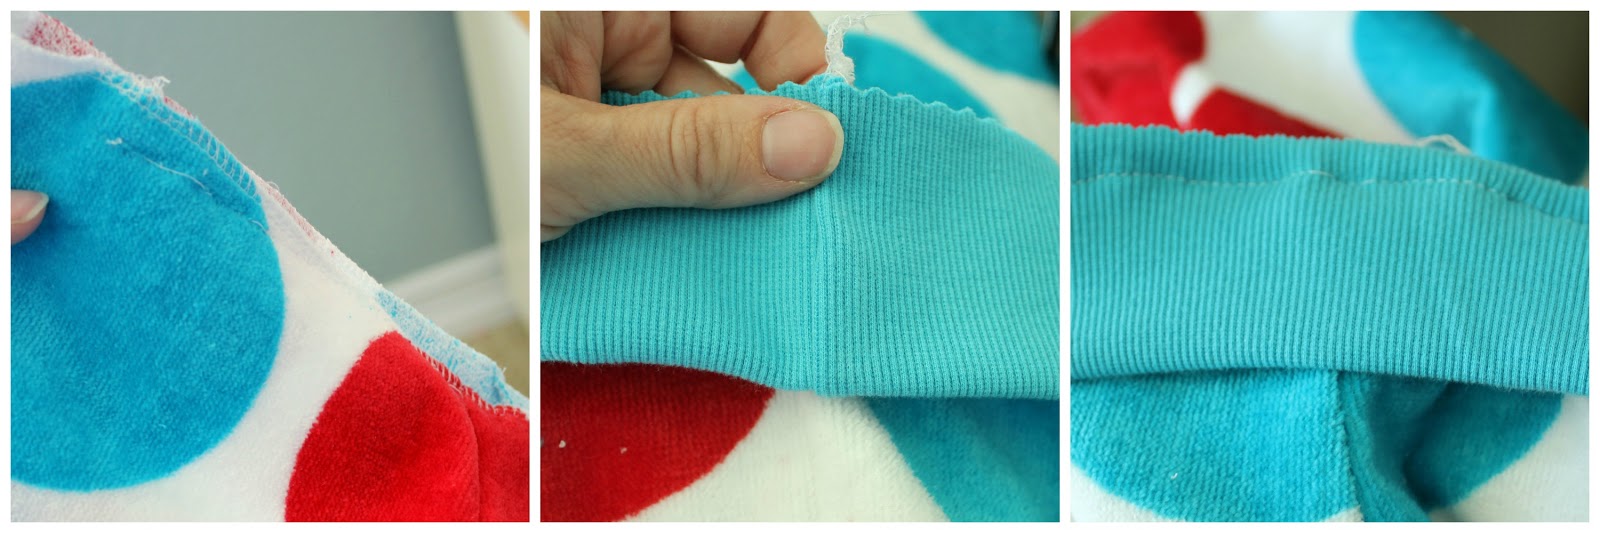
Figure out how big your waistband needs to be. First, measure your child's waist. Then divide that measurement in half and determine how tall you want the waistband to be. I wanted mine to be about 2 inches tall. So, I cut 2 pieces of my ribbed knit 4.5 inches tall (because it will be folded in half and you need seam allowance to attach to the waist) by half the waist measurement. Make sure the greatest stretch is running across the width of the waistband. Next, take your two waistband pieces, place them right sides together and stitch/serge the two short ends. Press your seams. Turn right side out and fold in half encasing the raw edge. 


Now, take the top of the pants and line it up with the raw edge of the waistband, matching side seams. Make sure the raw edge is pointing up and the finished edge is pointing down towards the legs. Pin and baste the waistband on to the pants leaving an inch or two opening for elastic (in a later step). You will stretch the waistband as you go to make the two fit together. 

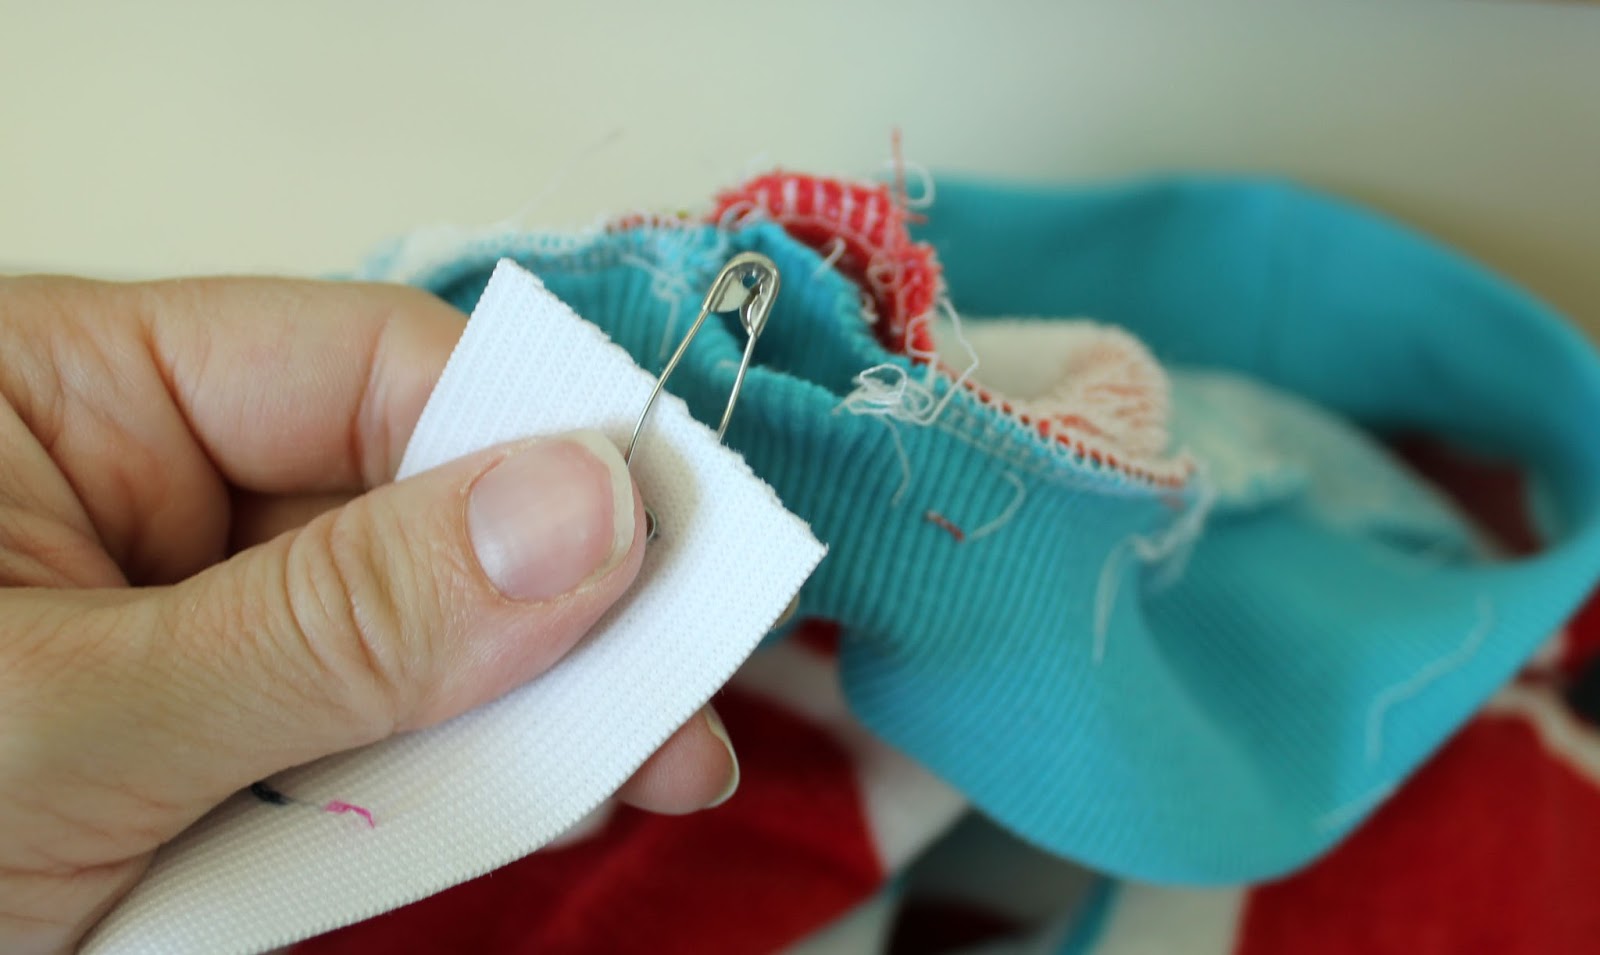
 **You can see in the photo sequence below that I did not realize the need for elastic until after my daughter tried them on, so it is out of order and I had to rip out my serged seams.** If I were to make them again I would add the elastic now through the opening. Use your child's waist to measure your elastic and thread through the opening with a safety pin.


After threading your elastic through, serge the basted waistband in place enclosing the opening. Make sure you do not catch the elastic in your serging stitch. And that's it. Enjoy your new towelling pants.

I have to say I kind of want to make an adult version to lounge around in...would that be weird??? Well, if I attempt it I will have to post them here :) Shannon


Monday, June 24, 2013

McCalls 6754: Blue Peplum Pattern Review


Sorry for the lack of posts. I am in the middle of this...

In case you can't tell...that is my craft room buried in there. I decided to finally put this room together and to say it is chaos is an understatement. This photo actually shows it in pretty good condition...scary, huh? But, shelves and  a pegboard are underway (thanks, honey) a whole pattern and fabric organization revamp is complete and I hope to dig myself out of this mess soon so I can get back to sewing. But...here is a look at something I made before this disaster.

Top: (DIY), Gold Belt (thrifted), White Jeans: Mossimo (thrifted), yellow earrings (DIY), wedge sandals: Antonio Melani (thrifted)

As I recorded where everything was from, it is crazy to me that this entire outfit is thrifted or made by me. The jeans were new with tags and the shoes are some of my favorites. Every once in awhile I get lucky at the thrift stores...enough to keep me going back! 

Now, on to the top. This is McCalls 6754: view c. I picked up a stretch sateen in navy blue from the clearance section at Joann. I knew I wanted to make this top but I was worried it didn't have enough stretch. Fortunately, I am able to wear it without problems. 


Pattern Description
MISSES' TOPS AND DRESSES: Close-fitting and flared tops and dresses have neckline variations, elasticized (seamed) waist, and narrow hems. B: underlined. C and D: bias bodice, and side front seams.
Designed for medium weight two-way stretch knits.
SUGGESTED FABRICS: Novelty Knit, Jersey. B: Lace Knit. Underlining B: Tricot.
NOTIONS: A,B,C,D: 11/2 yds. of 1/4" Elastic.


Pattern SizingY(XSmall-Small-Medium), ZZ(Large-XLarge-XXLarge)

Did it look like the photo/drawing on the pattern envelope once you were done sewing with it?
Yes, I made view C.

Were the instructions easy to follow? Yes, they were very easy.

What did you particularly like or dislike about the pattern? The pattern comes together quickly. I accidentally didn't read ahead and serged the skirt (peplum) portion to the bodice, not realizing you are supposed to attach elastic using the seam allowance as the casing. But, it seems to fit alright without it. Also, had I paid closer attention to the fabulous Mimi G's review I would have realized the arm is cut way too big. Instead, I was too enamored with her outfit and missed that part :) So, I had to take an unconventional route to make them smaller after they were sewn. I put in two darts and slashed them open. It is probably all kinds of incorrect in the sewing world, but it ended up being alright. It looks really wrinkly in the photo below but it wore much better. 


Fabric Used:
Blue Stretch Sateen

Pattern alterations or any design changes you made: Just the unintended sleeve change, in the future I think I would add a bit more length to the peplum.

Would you sew it again? Would you recommend it to others? 
Yes, I plan on making it again and possibly the dress version as well. 


Shannon

Monday, May 27, 2013

Project Sewn Signature Style


When I first saw the list for Project Sewn weekly challenges, I was most excited about this final week.


It seems easy for me to recognize things that appeal to my signature style. I am definetly a classic dresser. I love dresses and skirts with clean lines and classic silhouettes. I also love heels. I actually used to wear heels all the time (up until about 8 months pregnant with my first). Since kids, I have modified to wedges and actually have several flat shoes in my closet now (something I never had before!). I also am drawn to basic colors, especially navy blue. Seriously, I have a small weakness for all things navy blue! So, looking through some style icons I guess I could say I love the style of Jackie O. Here she is in a lovely sheath dress:

Photo Source: http://trippingthistles.tumblr.com/post/29823461705

Then one day while looking at Pinterest I came across this and I instantly fell in love:

Source: www.modcloth.com
More info on the dress found here

What is not to love? Navy blue with cream, pleats, a lovely silhouette...I had to have it. (oh, and it has pockets...awesome!) So I set out to make it. I bought 4 yards of some inexpensive navy blue cotton from Joanns. It was only $2 a yard (not the highest quality, but I wasn't sure if it would turn out). Then I bought the cream broadcloth (3/4 yd for a couple bucks too.) So armed with $10 in fabric, a heavy metal separating zipper, and 2 patterns from my stash I got started. 


For the bodice I used Butterick 4443. I cut a size 10 and ended up taking it in quite a bit at the chest. I had made this before and found it to be too baggy in the bust. (poor me :( haha) The only downside is I ended up losing the pleating detail at the neckline. I tried to make it work...but it just didn't fit with this pattern. 


For the skirt portion I used McCalls 5591. I used view C and made a view alterations. I cut a 12 and ended up losing quite a bit of fabric to make it work. Similar to the inspiration dress, I lost one pleat in the back and made only two. I also did not use the yoke pieces for the pattern. It took a lot of seam ripping and basting to get the top and bottom pieces to line up correctly, but in the end I am happy with it. I cut off about 4 inches from the hem and added a strip of cream broadcloth at the hemline. 

                         
I tried a new technique with this dress called bagging the lining (or I think that is what this technique is called). I had pinned a link to it and decided to give it a go. I really enjoyed it and it worked great. It helps eliminate a lot of the hand stitching which is always a plus in my book. In the original dress there is no lining, but I added one to the bodice. If I would have had enough fabric I would have done one for the skirt as well, but a slip will have to do. 


I am really excited that this dress turned out. In the future, I will have to trust my sewing skills more and allow my pocket book to be stretched for better fabric or find a fabric store to send me some free samples...anyone, anyone? 


Please stop by Project Sewn to see all the lovely looks people are creating.
Shannon

Thursday, May 23, 2013

Updated 80's- Project Sewn


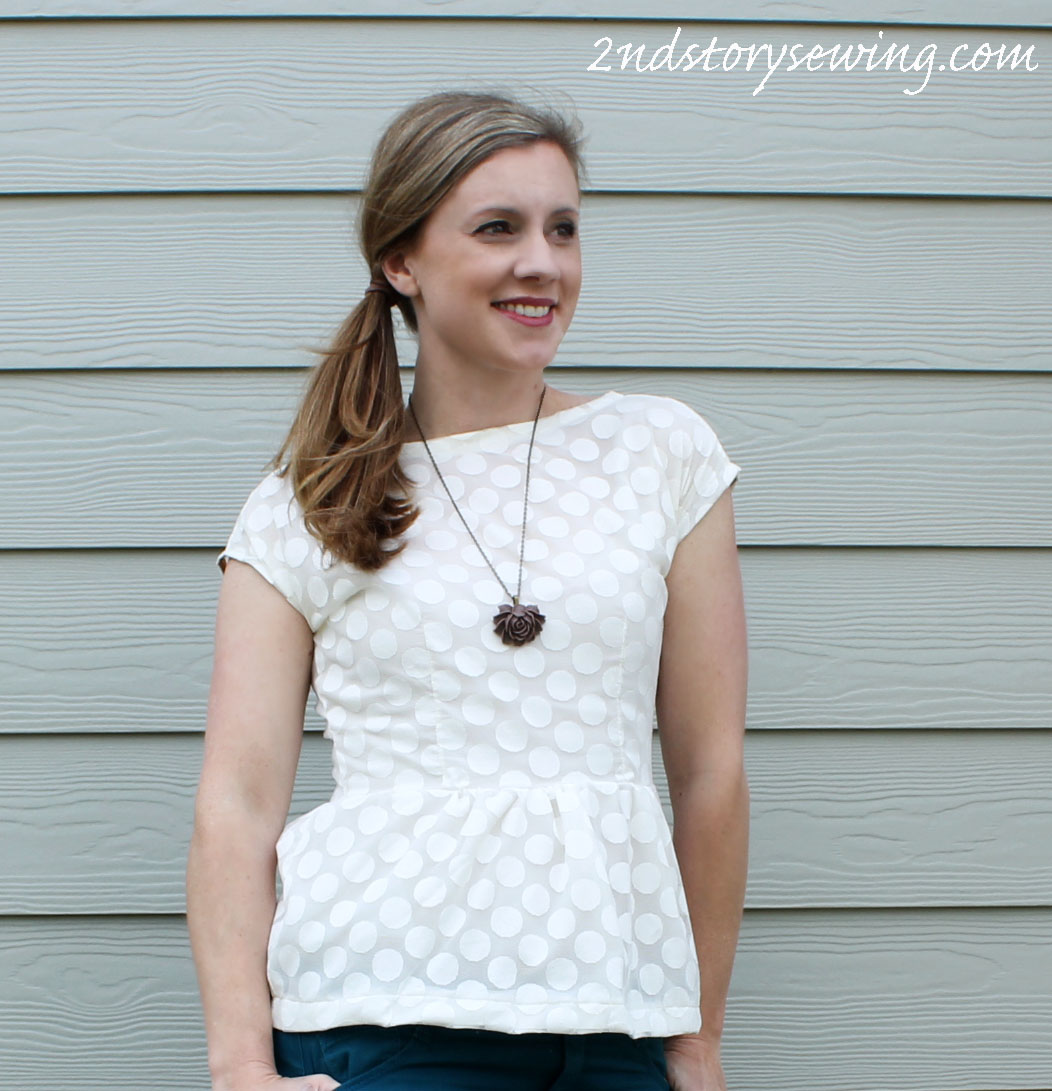
So, I have to be honest- I was going to sit this round out. The 80's style just didn't seem to appeal to me and I didn't want to make something I would never wear. And I had no idea what to make. But when Elizabeth and liZ posted the description and included peplums...I was totally in. I love peplums right now and had recently made a few. One of my favorites was this lace one that I created using my own pattern. I will post the pattern for the top as a free download soon...but unfortunately, I have still not learned how to grade patterns so it will just be this size.
                     Please check out all the submissions and vote for your favorite: HERE


 My take on the 80s was to use the look of the peplum, paired with a tapered leg pant. In place of lovely little socks with pumps (a beautiful 80s hit) I paired some 5 inch nude stiletto pumps...I love the picture below showing what fun stilettos and rocks are to mix...

And of course the look wouldn't have been complete without a side ponytail. That was one of my favorite looks in elementary/middle school (which was the 80s for me). So, I decided to do a more grown up version of the side pony. 

Peplum Top: DIY (pattern coming soon), Skinny Jeans (Walmart- $5 bucks), Pumps (Target- clearance, $9) Necklace (Clip Clip Hooray run by the very beautiful and talented Bethany).

Now, this is a top I know I will get a lot of use from and hey...if it has a touch of 80s to it, all the better :)


Shannon

Tuesday, May 14, 2013

Yellow Boden Inspired Sundress


Last year my mom sent me a Boden catalog...I was in love. I saw myself wearing practically everything in there. I began ripping out pages frantically to see what looks I could try to create myself. When I came across this yellow flowered tunic/sundress I instantly loved it. 

Source: http://mysuperfluities.blogspot.com/2012/01/boden-weekly-review-roundup-lot-to-look.html- The link is no longer active on Boden's site

I found the mustard yellow fabric (Calico Print) at Joann's on sale and thought it could work. I would have loved it even more in a brighter yellow like the one in the magazine, but sometimes it easier to just use something you can find easily. 


I then used Simplicity 2696 to create the dress. I used View F with a few alterations. I lengthened the tunic to a dress length and added darts in the back to give it a little more shape. I also used the sleeves from my Schoolhouse Tunic pattern. You can see the Schoolhouse Tunic HERE, HERE and HERE. (tad obsessed...no?) Overall I am pleased with this dress. I kept sewing the front neck slit on crooked and ripped it out several times. In the end, it is still not perfectly straight but I became so frustrated I had to stop the madness and just go with it :) This makes for an easy spring or summer dress to toss on with sandals. 

Now...here's to hoping the sunny warm weather sticks around...and lots of self tanner to prevent blinding people with my pale legs :) 

Shannon


Thursday, May 2, 2013

Aqua Wrap Top


Cardigan: DIY, Gray Tank: Walmart, White Jeans: Mossimo-thrifted with tags still on!

Early in my sewing days and pre-blogging days I made this knit wrap top. Up close there are many things I can see that I would do differently...but I tend to see that with all my sewing. I think it is a sign that sewing is an art you can always improve upon and learn new techniques, and that is one of the things I love about it. The pattern is McCalls 5241.


This top is nice for wearing long as a drape front cardigan or you can wrap it around you or tie it for a different look. The thing I did not like about this pattern is the way the shoulders fit. They sit too low...but I am pretty sure this was an early sewing mistake. Either I cut the pattern out incorrectly or I didn't make an adjustment where needed. I would love to sew this again but somehow I have lost the tissue pattern and instructions...but at least I have the pattern envelope (cause that is the most helpful part...haha).

This is a quick and easy pattern and great for beginners who are comfortable working with knits.

Shannon

Saturday, April 27, 2013

KCW: The Maggie Mae Tunic


Well, it is at the end of the week, but I am finally adding some participation over at Kid's Clothes Week. Yesterday I felt the need to whip up one of these cute Maggie Mae Tunic's for an adorable little girl. My friend Bethany's little miss thing is just adorable and I thought she could use a Maggie Mae. I dug through my stash and found a vintage pillowcase with some embroidery that I thought would be super cute. I originally intended the top to be all white but messed up while cutting...I think it was a great mistake! The back has green buttons to play off the green embroidery on the front. I didn't cut the pattern out as intended on the bottom so that the embroidery would stay in tact. In doing so, I miscalculated the length a tad...but I saw it on last night and it makes for a super cute summer dress. This is my second time sewing this pattern. You can see the shirt length version here.


I hope she can get some use out of it with the warm spring weather we are finally enjoying! 

Shannon

Thursday, April 25, 2013

Schoolhouse Tunic Remix


I have a small obsession with this pattern. As blogged about HERE, HERE, and HERE. So, I like to find ways to change it up a little so it doesn't look like I am always wearing the same top. 


For this remix I cut the bodice front on the fold as one piece so there would be no slit. I then gathered two long rectangles of fabric to make the ruffles. I cut one rectangle 3 inches by twice the width of the bottom hem and another one 4 inches tall by twice the width of the bottom hem. 


I used my serger to gather the ruffles and attach the two ruffles together prior to attaching it to the bottom hem of the shirt.


For the neckline I serged the raw edge and then ironed it toward the wrong side. I then stitched the hem down.


 I also put in a slit in the back neckline and used a button and elastic loop closure. There is a great tutorial for how to do that at CINO.


And I also omitted the pleats and gathered the fabric in the center front and back of the body instead. With the gathering, I do think I look pregnant without a belt on, but that being said, it will make a great maternity shirt one day! 


I would enjoy this top more if I had an elastic belt that fit correctly...I need to find that fast! Then, I will be able to enjoy this one throughout the spring :)

Shannon