Showing posts with label Girl's Clothing. Show all posts

Monday, May 6, 2013

Butterick 5877: Spring Time Ruffle Top


A few weeks ago I let my daughter pick out some fabric for a new top or dress. She settled on this cute spring themed bird fabric from Joann Fabrics.

Source: Joann.com

It was on sale along with this pattern that I picked up for a $1.00.
                                                       Source: butterick.mccall.com

While I am happy with the end product I had two little hurdles in the beginning. First, I didn't buy enough fabric so I had to get some more and secondly, I mistakenly cut the large ruffle with the birds going the wrong direction...uhh, had to scrap a large junk of fabric for that mistake!!! 


Pattern Description: Butterick 5877 Children's/Girls' Top, Tunic Dress, Belt and Leggings, Pullover top, tunic, or dress has lined, back button bodice. A: ruffles, narrow hem. B:bias, self-lined sleeves, C:collar, thread loops and self belt. B and C: lower band Leggings have elastic waist and no side seams, side slits and bow tie with raw edge finish.

Pattern Sizing: Available in Sizes 2-8

Did it look like the photo/drawing on the pattern envelope once you were done sewing with it?
Yes, I used view A.

Were the instructions easy to follow? Yes, they were very easy.

What did you particularly like or dislike about the pattern? I liked that the pattern did not have a ton of pieces and came together quickly. The top is a little roomy but my daughter is fairly petite. 

Fabric Used:
Doodles Collection: Spring Twill Birds Green Fabric
Yellow Broadcloth for lining

Pattern alterations or any design changes you made: None

Would you sew it again? Would you recommend it to others?
Yes, I think this is a cute and easy girl's top and I would like to make the dress from the pattern as well. If I were to make the same top again I would use a thinner fabric so that the ruffles would lay better. 


Shannon


Saturday, April 27, 2013

KCW: The Maggie Mae Tunic


Well, it is at the end of the week, but I am finally adding some participation over at Kid's Clothes Week. Yesterday I felt the need to whip up one of these cute Maggie Mae Tunic's for an adorable little girl. My friend Bethany's little miss thing is just adorable and I thought she could use a Maggie Mae. I dug through my stash and found a vintage pillowcase with some embroidery that I thought would be super cute. I originally intended the top to be all white but messed up while cutting...I think it was a great mistake! The back has green buttons to play off the green embroidery on the front. I didn't cut the pattern out as intended on the bottom so that the embroidery would stay in tact. In doing so, I miscalculated the length a tad...but I saw it on last night and it makes for a super cute summer dress. This is my second time sewing this pattern. You can see the shirt length version here.


I hope she can get some use out of it with the warm spring weather we are finally enjoying! 

Shannon

Tuesday, April 23, 2013

Meet...the smitten


It is the end of April, right? Because as of right now it is snowing outside. Last week we had 15 inches and now are being hit again with a milder storm. So, originally I was going to save this post for next fall when it may be more practical, but hey- winter is apparently not over in Colorado and so just in case it is the same where you live, check out the mitten/sock combo I like to call the smitten.


I wish I could say this idea was mine, but it was my husband's cousin's wife's idea...did you follow that? This summer we were talking about the annoyance of kids' gloves and how they get snow up their sleeve which makes them cold and whiny and she asked if I could sew socks on some mittens. I looked at her and thought- genius...why didn't I think of that. Then of course the name smitten...a glove you can love, came into my head...so one day, if you see these go BIG, you will know all my dreams came true. Well, not really, because I am about to tell you how you can make them. Enjoy.


First, you will need a pair of gloves or mittens (I bought these on clearance at Walmart for a $1 or $2, they also came with a hat). Then find a pair of children's socks that are close to knee length. I found a combo pack on clearance at Walmart as well. Grab some scissors, pins, and your machine. 


Cut off the foot portion of the sock. If you are some scrap busting master, I am sure you can find something to do with the foot portion. I tossed em...way too much stuff in this lady's craft room already!


Turn both the sock and the mitten inside out. Slide the sock over the mitten and pin. (This part is kind of hard to explain...I just wiggled the sock around until it was even with the bottom elastic edge of the mitten. You will have to reach your hand inside and fiddle with it a bit).


Set your machine to a wide zig-zag stitch.


You need to have a free arm machine so that you can release the base and have a narrower arm. Slide your sock onto the arm until you reach the point the sock and mitten meet. Begin stitching all the way around.
 
It is a tight fit and you can see above I am kind of having to push my fabric where I want it. Just go slow and keep adjusting the sock/mitten. Make sure your needle is DOWN in the fabric before you adjust the fabric.

Then snip the thread, and turn right side out- and that's it! My kiddos used them for the first time last week and they worked great...even better, my 2 year old couldn't take them off on his own so they stayed put until I wanted them off. Which is nice if you have a kid who constantly tries to take mittens off while out in the cold!


Shannon

Thursday, March 21, 2013

Easter Outfits

I finally finished the kids' Easter outfits. My daughter's dress, although I had made the same one several years ago for my niece, proved to be a challenge. I have never picked out so many seams in my life!! I had to take in a couple inches on each side...and in the end I just had to make it work the best that I could. She loves the net ruffle slip underneath and I think she looks adorable. And who can resist a little dude in a tie?


The material I used for the polka dot dress and tie is...wait for it...a thrifted bed sheet! I know that isn't really that surprising, since I have used a bed sheet for a dress before HERE
But I have to say, I really didn't think this sheet would look as cute as it does sewn into clothes. I totally love it and it made for cheap outfits. I think the sheet was a couple bucks!
 The tutorial for the tie is found here. It was super easy and quick (I actually did this while my kids were awake, which says a lot. I normally do not sew when they are up, but that is how fast and easy it came together. )

My daughter's dress is from the Simplicity Project Runway patterns: 2989. The dress isn't difficult but when I tried it on her early in the process I thought the fit was right, but once I inserted the lining and zipper it was WAY TOO BIG. How does that happen? So, out came the seam ripper...I also added piping at the skirt and band seamline. The picture below shows the net ruffle underneath which is so fun for spinning and twirling.


Happy Easter!

Shannon


Saturday, January 26, 2013

Finally a Finished Project

Sorry for the blogging hiatus, I seem to have several projects near completion but none all the way done. Take for instance this Maggie Mae Tunic, which has been done for weeks but never photographed. Well, I finally got dressed for the day, convinced my daughter to put it on, and headed outside to snap a few photos. As you can see, the photos are nothing spectacular but at least I finally snapped a few pics.

This pattern is from Shwin and Shwin and it is great. It comes together quickly and I think I am going to try a knit version and delete the button back soon...no promises that it will work out. I highly recommend this pattern for one that will last you a long time, it is very versatile and has many sizes.  And as you can see my daughter loves the pockets!

I promise I will have a lot more content soon...the family room project is so close to being done.

Shannon

Monday, December 10, 2012

A Vintage Jumper


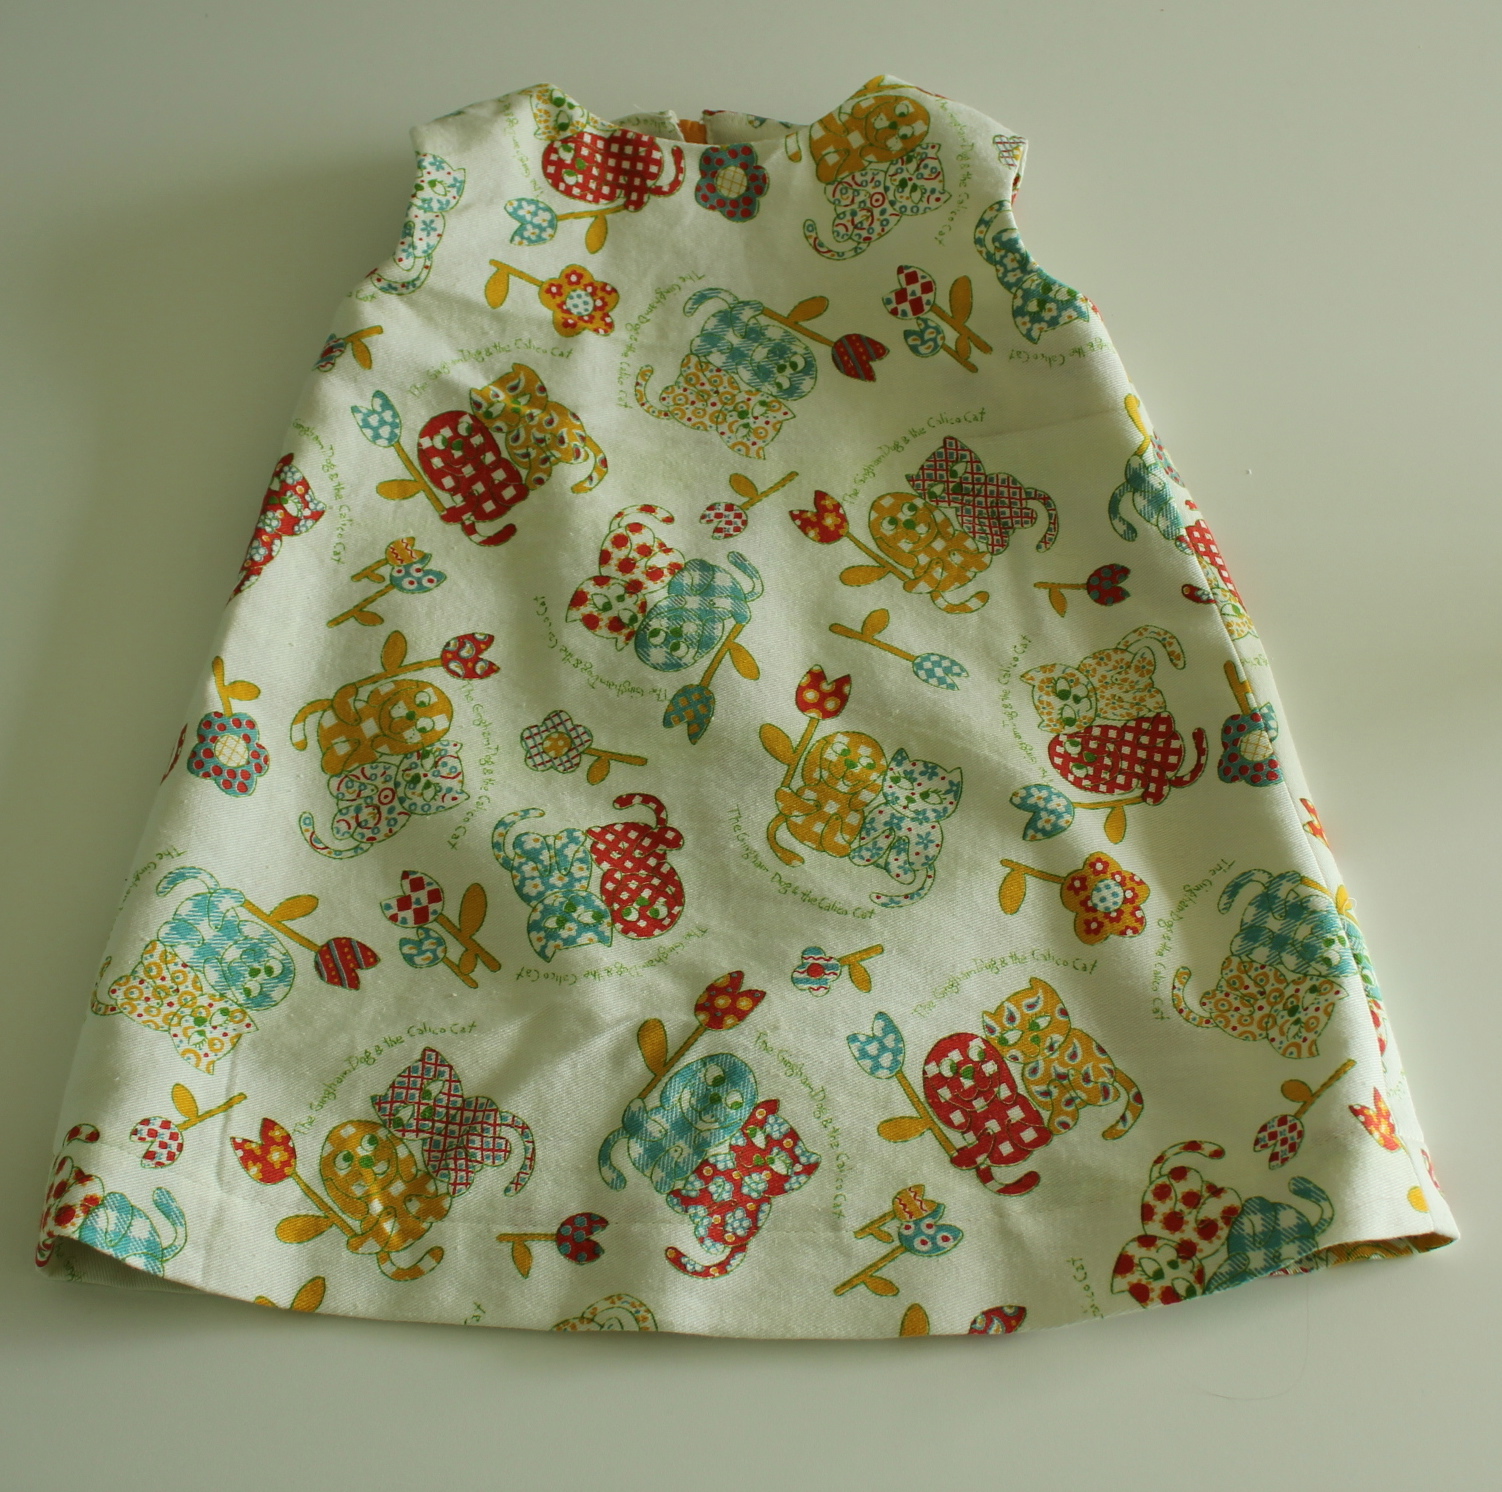
I have been working on depleting my fabric stash and decided to try and use up more of this vintage dog and cat fabric I found at a thrift store. I used some of it in an earlier project: Travel Fabric High Chair. This time I decided to use it with a vintage pattern: Simplicity 6113: Jiffy jumper & dress- here is one I found on Etsy.

The only modification I made was omitting the hook and eye closure and instead adding a button with an elastic loop.
It ended up being a little too big...but my daughter refuses to wear anything I make anyway...so I guess it won't be a problem. However, I then wonder why I just bought three new patterns today for her...when will I learn???
 Here is the little stinker after LOTS of convincing to put it on for about 10 minutes for some pictures, and this is one of the better shots I could get out of her :)
Shannon

Sunday, August 19, 2012

Toddler Ruffle Sweatshirt

Ok...I really wish I had more pictures of this and that I took pictures while creating it. Unfortunately this was made before my blogging days and I didn't. I am showing it to you know because my crafting room is packed away during a move and I am in a creative freeze- it is painful - ha ha! This picture really doesn't do this cute little sweater justice. In person, it was adorable. I found the turquoise fabric at a thrift store and one day decided to play around and see what I could create with it. I took one of my daughter's sweaters and used it as a "pattern" to create this one. I then used white bias tape to quickly finish the sleeves and hem. Next, I cut two strips of the turquoise fabric about three inches wide and twice the length of the sweater from the neck edge to the bottom edge. Then cut two pieces of white knit (from an old t-shirt) about 2 inches wide and the same length as the turquoise strips. I ruffled the two pieces, layered the white on top of the turquoise and sewed them down the center front edges. I also used some extra bias tape to create a small tie in the center front. Again, I wish I had photos to document this process so it made more sense. I can't wait to get back to my craft room, so there will be many projects ahead I promise!
Shannon

Friday, May 11, 2012

Circle Skirt


A long time ago I stumbled across the blog MADE and fell in love with many of the cute ideas. Dana posts great tutorials and makes adorable kids clothing. I decided to whip a circle skirt up for my daughter and within 30 minutes it was done! I love those projects. I used Amy Butler's Passion Lily fabric, 2.5 inch wide elastic on top and bias tape on the bottom edge. I did make one for myself in a silky fabric without as much success...think I may try a half circle skirt instead to decrease the amount of bulk around the waist and hip areas...I will post if it ever turns out :)

Shannon

Thursday, March 29, 2012

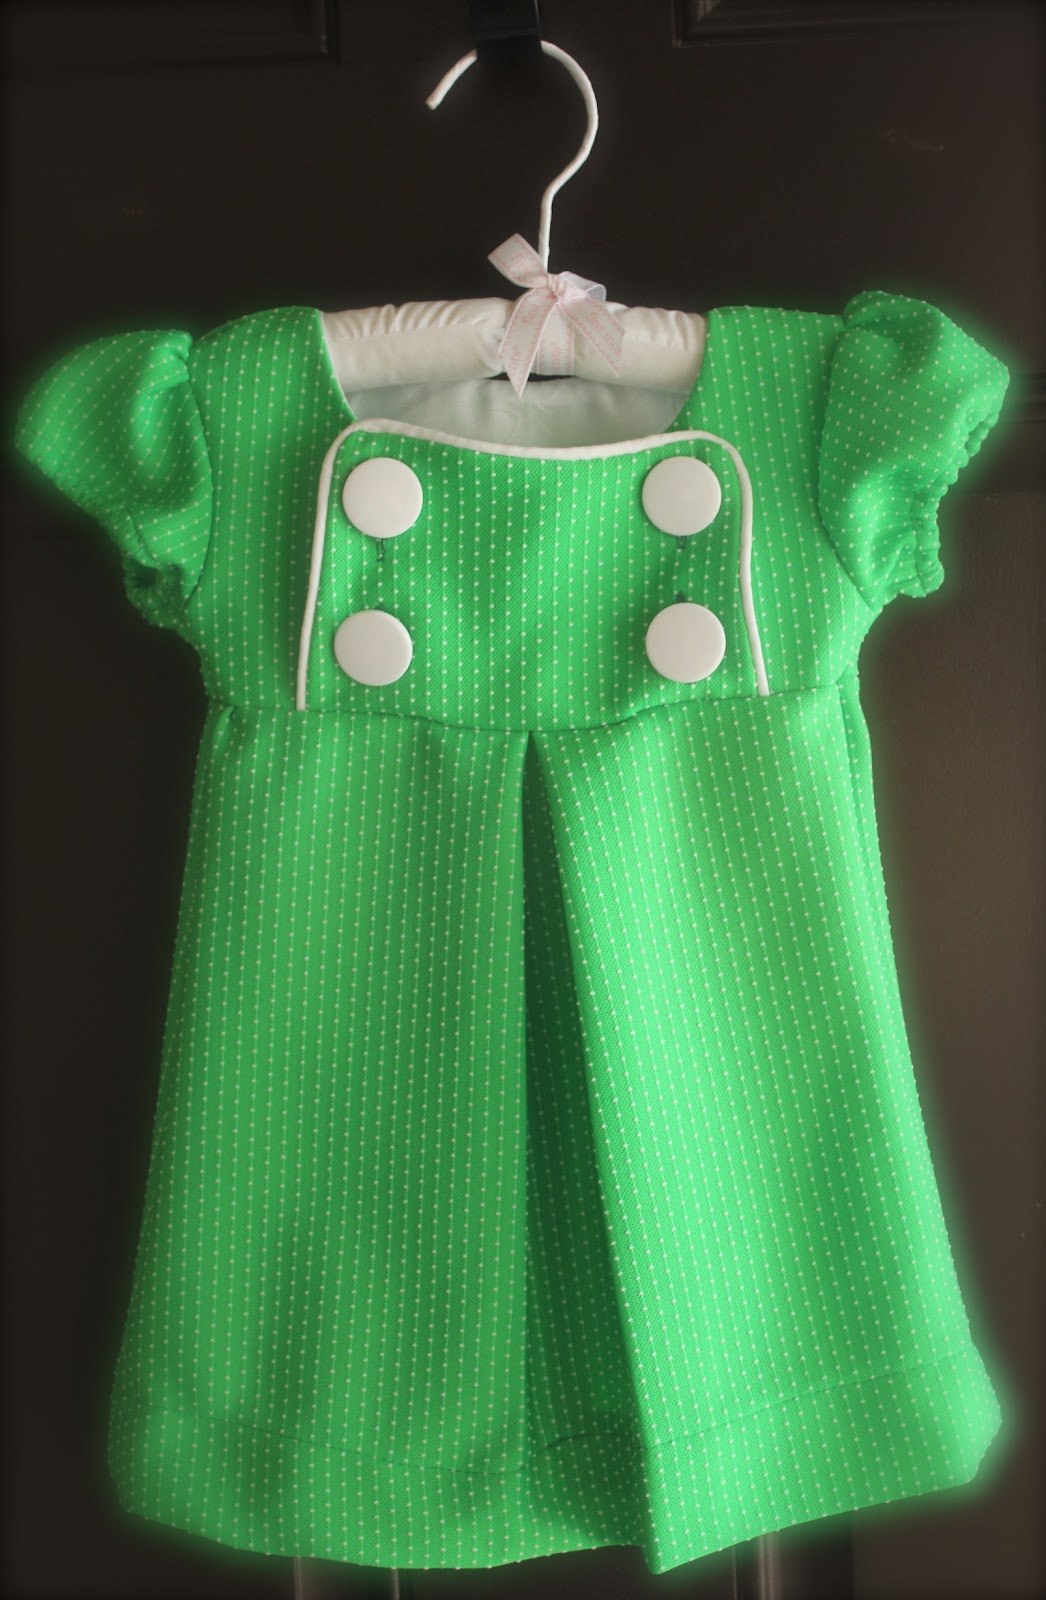
Little Green Junebug Dress


I stumbled upon this retro green and polka-dot fabric at the thrift store. Something about it caught my eye even though it was polyester and very bright. I picked up several yards of it for a few bucks and decided to make a couple dresses, one for me (tutorial coming soon) and one for my daughter. I was searching for an A-line style dress with a retro feel. I came across Jess at Craftiness is not Optional's sew along for her Junebug Dress. I created this dress for my daughter with a few alterations to the pattern.

1. When creating the bodice flap I added piping. I began by pinning the piping on to the right side of the flap and basting it in place. Make sure you cut slits in the piping at each corner to help it turn. After basting the piping, I pinned the lining to the right side of the flap and stitched it closed (sides and top only) per Jess' tutorial. Then flip the piece right side out and press.

2. I only had enough room for 2 buttons instead of 3 because the ones I had on hand were so large, so I modified the pattern by only making 2 buttonholes on each side of the flap.

3. I wanted a pleat in the front and back of the skirt instead of gathering it. I went for a pleat because of this fabric's bulkiness. When gathered it creates a very full effect.  I wanted the fabric to lay down flat in a more defined A-line so I went with pleats instead. First, I took my skirt piece and measured across to find the center of the front and back. I marked it with a pin and then measured 2 inches out from each side of the center pin and marked those two spots.

Next take each outside pin and fold it in towards the center pin and then back on itself to create a pleat. Do the same for the opposite side so that it looks like this when finished.
Baste the pleat and iron it down flat. Make sure you press the pleat a good ways down your skirt to hold it in place. (I didn't do the best job of this and you can see that in the photos). Then create the same pleat in the center back of the skirt. Then continue to attach the skirt to the bodice per the tutorial. Make sure your pleats are lined up with the center front and center back of the bodice before sewing them together.

4. The only other modification I made was to shorten the dress. I wanted more of a mini dress length so I probably shortened the dress a good 4 inches or so from the pattern measurements. I took a gamble and stitched it before trying it on my daughter- luckily it was not too short.

 Overall it made for a cute little dress...if only I had made it in time for St. Patrick's Day!

Shannon

Linking up to the following parties: pincushion creationsShwin and ShwinTatertots and JelloKojo Designs, Country Momma Cooks: Link & Greet #12love notes by lauryn