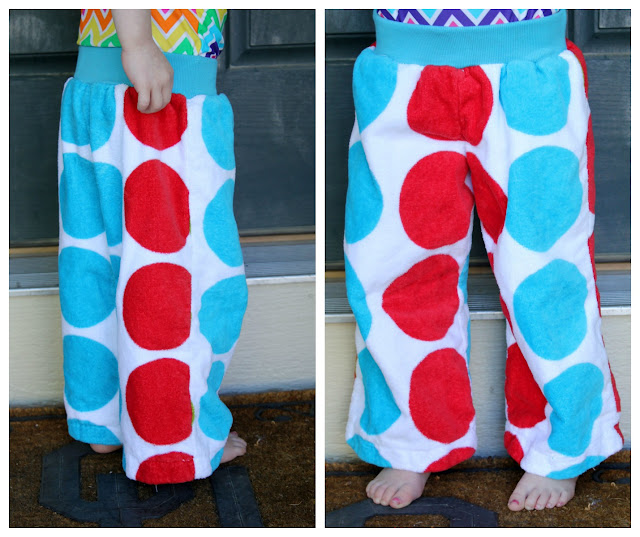
Earlier this spring I was flipping through the pages of the latest Mini Boden. I came across these adorable pants made of towelling material.
Here is my DIY Towel Pant version.
First, find yourself a cute towel. I picked up one last year from Walmart for about $5. I have seen so many cute ones out this year...but I am waiting for the clearance prices :)
First, find yourself a cute towel. I picked up one last year from Walmart for about $5. I have seen so many cute ones out this year...but I am waiting for the clearance prices :)
Next, find a loose fitting children's pants pattern or create your own from tracing a pair of your child's pants. For this DIY version I chose McCalls 5222. Next, carefully line up your pattern using one half of the towel. Do not fold the fabric in half and cut 2 fronts and 2 backs at once if you have a pattern that needs to line up. Instead, cut one front and one back piece on one half of the towel as shown below.
Then use those pieces to cut the 2nd piece. Simply flip them over onto the other uncut half of towel and line up your pattern. You can see how I matched my circles. I put some arrows on the photo below to help show this step.
After cutting out your pattern, sew the pants following the instructions until the waistband. For the waistband, I decided to use a contrasting rib knit similar to the Mini Boden pants. I did not thread a drawstring through but may try that on a future pair for my son.
Figure out how big your waistband needs to be. First, measure your child's waist. Then divide that measurement in half and determine how tall you want the waistband to be. I wanted mine to be about 2 inches tall. So, I cut 2 pieces of my ribbed knit 4.5 inches tall (because it will be folded in half and you need seam allowance to attach to the waist) by half the waist measurement. Make sure the greatest stretch is running across the width of the waistband. Next, take your two waistband pieces, place them right sides together and stitch/serge the two short ends. Press your seams. Turn right side out and fold in half encasing the raw edge.
Now, take the top of the pants and line it up with the raw edge of the waistband, matching side seams. Make sure the raw edge is pointing up and the finished edge is pointing down towards the legs. Pin and baste the waistband on to the pants leaving an inch or two opening for elastic (in a later step). You will stretch the waistband as you go to make the two fit together.
After threading your elastic through, serge the basted waistband in place enclosing the opening. Make sure you do not catch the elastic in your serging stitch. And that's it. Enjoy your new towelling pants.
I have to say I kind of want to make an adult version to lounge around in...would that be weird??? Well, if I attempt it I will have to post them here :) Shannon


Super cute pants! I love the blue and red dots!
ReplyDeleteNavy Wifey Peters @ Submarine Sunday Link Party