Saturday, April 28, 2012

Schoolhouse Tunic Take 2...well 3


I posted earlier about the first schoolhouse tunic I made using Sew Liberated's pattern. Due to the higher cost of this pattern I wanted to make sure I used it several times. I had decided to try to make it as a dress for a variation. I really wanted to make myself a top out of this Amy Butler fabric I had been holding on to. I had to piece together this one because I didn't have enough fabric and the end result...a way too small dress. So, lucky for Betsy...she is a lot smaller than me and it fit her. Since I happened to be at her house while making it, I just tossed it over to her and tried to move on...which was hard, I loved that fabric! Here is a pic of the finished dress. The two alterations I made were leaving it sleeveless (adding bias tape facing instead) and cutting it longer to make a dress.


Oh well, on to take 3. This time I used a lovely fabric I found at the thrift store. It was actually two curtain panels but I loved it and for $8.00 I was able to make a dress and a tunic out of all this fabric, with some left over! I would say it was a good deal. Again I added several inches to the bottom of the pattern, just continuing the slight a-line, to create a dress length. Overall, I like the finished dress but I think I will stick to the tunic length or shorter for future projects using the Schoolhouse Tunic pattern.
Shannon


Wednesday, April 25, 2012

Bridesmaid Dress Refashion

My best friend in the whole wide world got married a couple weekends ago in Chicago.  It happened to be a beautiful weekend for a wedding considering it was March.  She let the wedding party pick out their dresses as long as they were black.  Shannon had this adorable dress that she was willing to let me borrow:


I loved it and was ready to fly to Chicago for the wedding.  Problem was, I'm a lot shorter than Shannon.  More than I realized!  This dress ended up hitting me at the ankles instead of being tea length.  So, Shannon said I could cut it up.  I jumped at the opportunity (after a little convincing that it was okay if I did) and made this out of it at 11:00 the night before I needed to catch my flight:


I made the skirt the length I wanted, but knew I wanted to leave a little of the tulle out of the bottom to add a little to the dress.  I loved the final product and had a blast at the wedding!  Here I am with the beautiful bride!


Betsy

Sunday, April 22, 2012

Mama's Little Green Dress

Earlier I posted about using the Junebug Dress pattern to create this version for my daughter. I made this using a green polyester fabric picked up at the thrift store. I had so many yards of this fabric that I decided to make a dress for myself. Here is the completed dress and tutorial:
Supplies: 2 yards of fabric, 1 fitted t-shirt, thread to match your skirt material, elastic thread, scissors, sewing machine, ruler

STEPS:
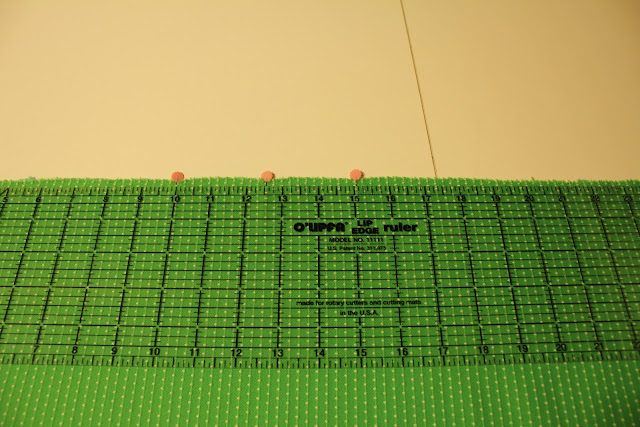
1. Take the fabric and wrap it around your body about 1.5 times to find out how wide you need your fabric. (Yes that is me in this pic...my hair was blonde when I made the dress but not in the modeling shots-oops) Then measure from below your chest to where you want the dress to fall and measure. Add 4.5 inches to this length to allow for seam allowances and a deep hem. Once you have cut out this large rectangle of fabric cut it into two even pieces, width wise, to create a front and back for the skirt.
 2. Next measure and mark the center of the front of the skirt, mark with a pin. Then measure out 2.5 inches from each side of the pin and mark. Create your pleat by folding the outside pin onto the center pin and then folding the fabric back on itself. Repeat with the other side.
 3. Baste the pleat in place, press the pleat down for several inches. Repeat steps 2 and 3 with the back skirt piece of fabric. Sewthe front and back of the skirt together at the sides, right sides together.
4. Next put on your t-shirt and mark where you want the skirt to be attached. Cut the shirt off just below this measurement. Mark the center front and back of the t-shirt with a pin. Use this mark to match right sides of the shirt and skirt together. The pin should line up in the center of the pleat.
5. Next, wind your bobbin with elastic thread. You will want to wind this by hand. Then using the elastic thread for your bobbin and regular thread on the top stitch the shirt and skirt together. Using elastic thread will allow the dress to be pulled on and off easily.
Make sure you pull the t-shirt as you sew to fit it to your skirt.
6. Next turn up your hem and press. I first pressed up 2 inches and then another 2 and 1/4 inches to create a deep hem. 
7. Finally, I made a sash to wrap around the dress with leftover fabric. I cut a strip about 8 inches long and the width of the fabric. Fold the fabric in half right sides together and stitch the one long end. Turn the fabric right side out, tuck in the ends and press, then topstitch all the way around the fabric sash. 


Shannon

Wednesday, April 18, 2012

Right "Frame" of Mind

I thought I would take a break from sewing projects and talk about how I LOVE to do craft projects for my house.  Love.  In fact, I am running out of wall space to do new ones.  Doesn't make me very happy!  My friend, Bobbi, and I got what we thought was a brilliant idea for our homes.  Once we did it, we realized that apparently others had the same idea.  Oh well.  I still love it!  


We decided to go around to all of the local ARC's and Goodwill's (there are A LOT around here).  Bobbi was looking for specific shaped frames.  I love randomness, so I was looking for whatever caught my eye.  It didn't matter what size, color, or condition - in fact some of my frames used to be mirrors, and one was even a clock.  We took out all the glass (or whatever was in the frame), disposed of it if it was gross or reused it if we could, and cleaned the frames up.  Then, we enlisted the help of Bobbi's husband, Jason, to help us make some "repairs".  Again, we were not picky with the frames we bought.  


We laid out how we wanted them to look on our walls and took a picture. 


This is a picture of what mine looked like originally.  

Then, we took them to the garage and spray painted them so they all were one color.  This is where you could get creative.  I have a ton of color going on in my living room already, so I used black, but get creative!  Add some color to a room with this project if you need it.

Here is a  picture of my final project.  I put mine in my living room and Bobbi put hers in her stairwell.  We love them!  


Betsy

Sunday, April 15, 2012

The Lu Lu Skirt

Materials:
Sheer fabric (enough to wrap around your body twice and long enough to reach from your ribcage to the floor) I picked up 5 or so yards of this fabric at a thrift store...score!
2.5 inch elastic (enough to fit around your ribcage, below your chest) I dyed mine yellow using this tutorial: MADE: Dying Elastic
Thread
Scissors
Sewing Machine


Finally hem the bottom edge of your skirt. I used the rolled hem foot to create a narrow hem on my skirt.
The skirt could be attached to a tank top or close fitting t-shirt to create a dress. I only chose to leave it as a skirt because I wanted to be able to wear the tank top on its own or with other things.
Then, enjoy your light and airy skirt (of course with a slip underneath it...it is sheer after all :)

Shannon

Wednesday, April 11, 2012

Cutie Pi Onesie


The math teacher at our school is about to have a baby. When I found out she was expecting at the beginning of the year, I immediately had this idea pop into my head. While I know it is cheesy and has probably already been done, I couldn't resist. So I quickly cut out a stencil using my cricut and freezer paper. Next, I painted the cutie stencil using fabric paint. Then I printed the math pi image from online and cut it out to use as a stencil for the gray knit fabric. I attached the pi sign using Wonder Under and then stitched around the edge to make sure it was securely attached. Hopefully she will like it and not find it too cheesy :)
Shannon

Tuesday, April 10, 2012

Maxi Dress Tutorial


A couple weeks ago I pinned this little number on pinterest: Maxi Dress...Beautiful? Yes Affordable? No

So, I thought I would experiment to see if I could create my own version of this $800 Maxi Dress. Here is what I came up with.


The following is the tutorial. Be aware this is pic heavy! I apologize for the horrible pictures, they were mostly taken in my basement with horrible lighting.

What you will need:
Jersey Knit Fabric (3 yards)
Thread to match your fabric
Scissors
3/4 inch non-roll elastic
Sewing Machine
Twin Needle (optional)

1. Take your 3 yards of fabric and wrap it around your body one and half times to determine your skirt width. For me, it was approximately the width of my fabric, so I did not need to make any cuts. Next, measure from just below your chest to the floor and use this as your skirt length measurement. Cut your fabric to create a long rectangle using your skirt width by your skirt length measurements.

2. Since you will be adding pockets, you need to have a front and back piece to your skirt. **If you wanted to omit the pockets, simply sew a seam up the center back of the skirt piece.** If you are adding pockets, simply cut down one long side of your fabric to create two equal rectangles (a front piece and a back piece). Then lay your skirt pieces to the side for now.

3. Take the bodice pattern pieces and cut out one bodice back on the fold and two bodice fronts. **My pattern pieces are for a size 4-6 for the top.** Pin the bodice front to the back, right sides together, at the shoulder. Sew it together at the shoulders.

4. Press the shoulder seams open. Next, take the sleeve edge and create a finished edge by ironing 1/4 inch and then another 1/4 inch towards the wrong side. Edge stitch next to the ironed edge. Do the same thing for the front of the dress bodice, ironing all the way around the neckline. This is where you can opt to use a twin needle. It allows you to create two even lines of stitching on the front while making a small zig zag stitch on the back which allows the fabric to keep some stretch. The bodice is loose enough that you can stitch this with a straight stitch using a regular needle and will still be able to take the dress on and off easily.


Underside of Fabric with Double Needle
Top Side of Fabric with Double Needle
5. Then pin the bodice right sides together under the armholes and stitch. Note that this will be a very small amount.

6. Next take your bodice and turn it right side out. Overlap the front bodice pieces, laying the right piece on top of the left and matching the center line. Pin the pieces together and baste.

7. Go back to your skirt pieces and sew the two skirt pieces right side together for about 5 inches down on each side starting at the top of the skirt. This will allow you to make your elastic casing and attach it to the top prior to determining where your pockets will go.  It is now time to create the casing. Keeping the skirt inside out, take the top of your skirt and iron down a 1 inch hem all the way around the top. Then iron another 1 and 1/4 inch all the way around. Stitch next to the edge of the casing, leaving an opening for the elastic.


**A hint for sewing near the edge. Line your foot up to the edge of the casing as in the above picture. Then move your needle position to the far left position. As you stitch keep your foot in line with the edge of the casing and your stitching line will stay straight and near the edge.**

8. Then take the elastic and wrap it around your rib cage under your chest. Cut off the needed amount. Do not pull the elastic tight while measuring it. Thread your elastic through your casing using a safety pin. Once it is pulled through, overlap the two ends by about an inch and stitch them together. Then finish stitching around the casing edge to finish off where you had left it open to insert the elastic.

9. Attach the bodice to the skirt. First mark the front center of the skirt, back center of the skirt, and back center of the bodice with pins. Use these as guides when pinning the skirt and bodice together, lining up all pins and matching the center of the bodice front (where it overlaps) with the center front pin. Pin the right sides together and stitch. The easiest way to pin the two together is to have the skirt right side out and slide the bodice (inside out) over the skirt upside down. Stitch at the top of the elastic. When you sew the two parts together you need to pull and stretch the elastic quite a bit to get the skirt and bodice to fit together. If you find there is way too much fabric for you to pull, you can gather the top in places first. (You could gather it on the bottom of each bodice piece).


10. Now it is time to add your pockets. Put on your dress and determine where you would like your pockets to fall. Mark this on your dress. Cut out 4 pocket pieces and attach the pockets using this tutorial from Burda: In Seam Pocket Tutorial


11. Finally, pin and hem your dress to the desired length.

Monday, April 2, 2012

DIY Liquid Hand Soap

I have made my own laundry detergent for years so I recently found a pin for DIY Liquid hand soap and thought, why not? So, as the link above states, you need a bar of soap and liquid glycerin.

I had trouble finding the liquid glycerin. It was not at my local grocery store but Walmart did have it near their bandaids section. I decided to try Lavender Pure-castile soap. Follow the directions as given in the link and by the end of the day you have a whole gallon of liquid hand soap. Super simple and super cost effective.
How it turned out: The tutorial mentions the thickness of the soap as it hardens. I thought I addressed this prior to pouring it into my gallon container but as I went to pour it into my soap container this morning it was so thick it would not pour. So I squeezed some out into a bowl and added more hot water. It seems to have helped but isn't quite the consistency I wanted...I must have done something wrong! But, overall it gave me lots and lots of soap and if I can get the consistency issue corrected I would say it was well worth the time and the little money to create this much liquid soap.